eDiscovery Daily Blog
How to Create an Image Using FTK Imager – eDiscovery Best Practices
A few days ago, we talked about the benefits and capabilities of Forensic Toolkit (FTK), which is a computer forensics software application provided by AccessData, as well as how to download your own free copy. Now, let’s discuss how to create a disk image.
Before we begin, it’s important to note that best practices when creating a disk image includes the use of a write blocker. Write blockers are devices that allow data to be acquired from a drive without creating the possibility of accidentally damaging the drive contents. They allow read commands to pass but block write commands, protecting the drive contents from being changed. Tableau and FireFly are two examples of write blockers.
It’s also important to note that while we’re showing you how to “try this at home”, use of a certified forensic collection specialist is recommended when collecting data forensically that could require expert testimony on the collection process.
Create an Image Using FTK Imager
I’m going to create an image of one of my flash drives to illustrate the process. To create an image, select Create Disk Image from the File menu.
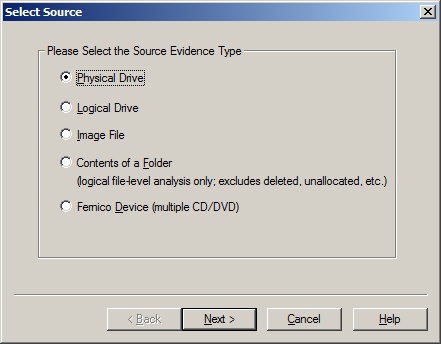
Source Evidence Type: To image an entire device, select Physical Drive (a physical device can contain more than one Logical Drive). You can also create an image of an Image File, which seems silly, but it could be desirable if, say, you want to create a more compressed version of the image. You can also image the specific Contents of a Folder or of a Femico Device (which is ideal for creating images of multiple CDs or DVDs with the same parameters). In this example, we’ll select Physical Drive to create an image of the flash drive.
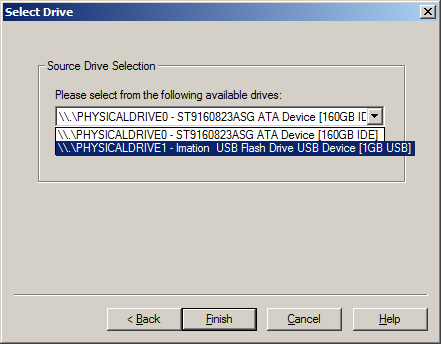
Source Drive Selection: Based on our selection of physical drive, we then have a choice of the current physical drives we can see, so we select the drive corresponding to the flash drive.
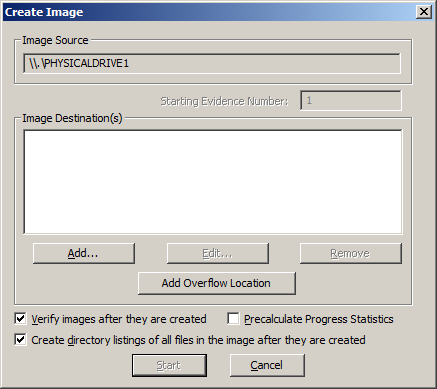
Create Image: Here is where you can specify where the image will be created. We also always choose Verify images after they are created as a way to run a hash value check on the image file. You can also Create directory listings of all files in the image after they are created, but be prepared that this will be a huge listing for a typical hard drive with hundreds of thousands of entries.
Select Image Type: This indicates the type of image file that will be created – Raw is a bit-by-bit uncompressed copy of the original, while the other three alternatives are designed for use with a specific forensics program. We typically use Raw or E01, which is an EnCase forensic image file format. In this example, we’re using Raw.

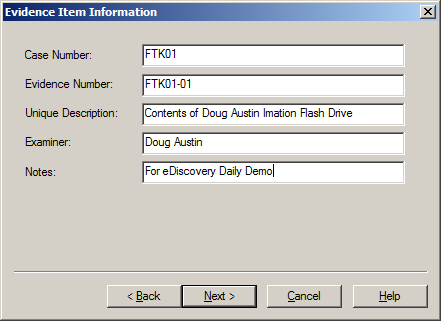
Evidence Item Information: This is where you can enter key information about the evidence item you are about to create to aid in documenting the item. This information will be saved as part of the image summary information once the image is complete.
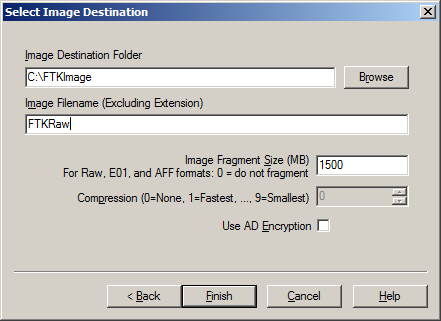
Select Image Destination: We’ll browse to a folder that I’ve created called “FTKImage” on the C: drive and give the image a file name. Image Fragment Size indicates the size of each fragment when you want to break a larger image file into multiple parts. Compression indicates the level of compression of the image file, from 0 (no compression) to 9 (maximum compression – and a slower image creation process). For Raw uncompressed images, compression is always 0. Use AD Encryption indicates whether to encrypt the image – we don’t typically select that, instead choosing to put an image on an encrypted drive (when encryption is desired). Click Finish to begin the image process and a dialog will be displayed throughout the image creation process. Because it is a bit-by-bit image of the device, it will take the same amount of time regardless of how many files are currently stored on the device.
Drive/Image Verify Results: When the image is complete, this popup window will appear to show the name of the image file, the sector count, computed (before image creation) and reported (after image creation) MD5 and SHA1 hash values with a confirmation that they match and a list of bad sectors (if any). The hash verification is a key check to ensure a valid image and the hash values should be the same regardless which image type you create.
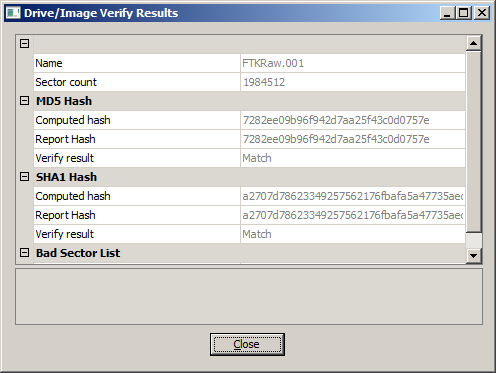
Image Summary: When the image is complete, click the Image Summary button to see the view a summary of the image that is created, including the evidence item information you entered, drive information, hash verification information, etc. This information is also saved as a text file.

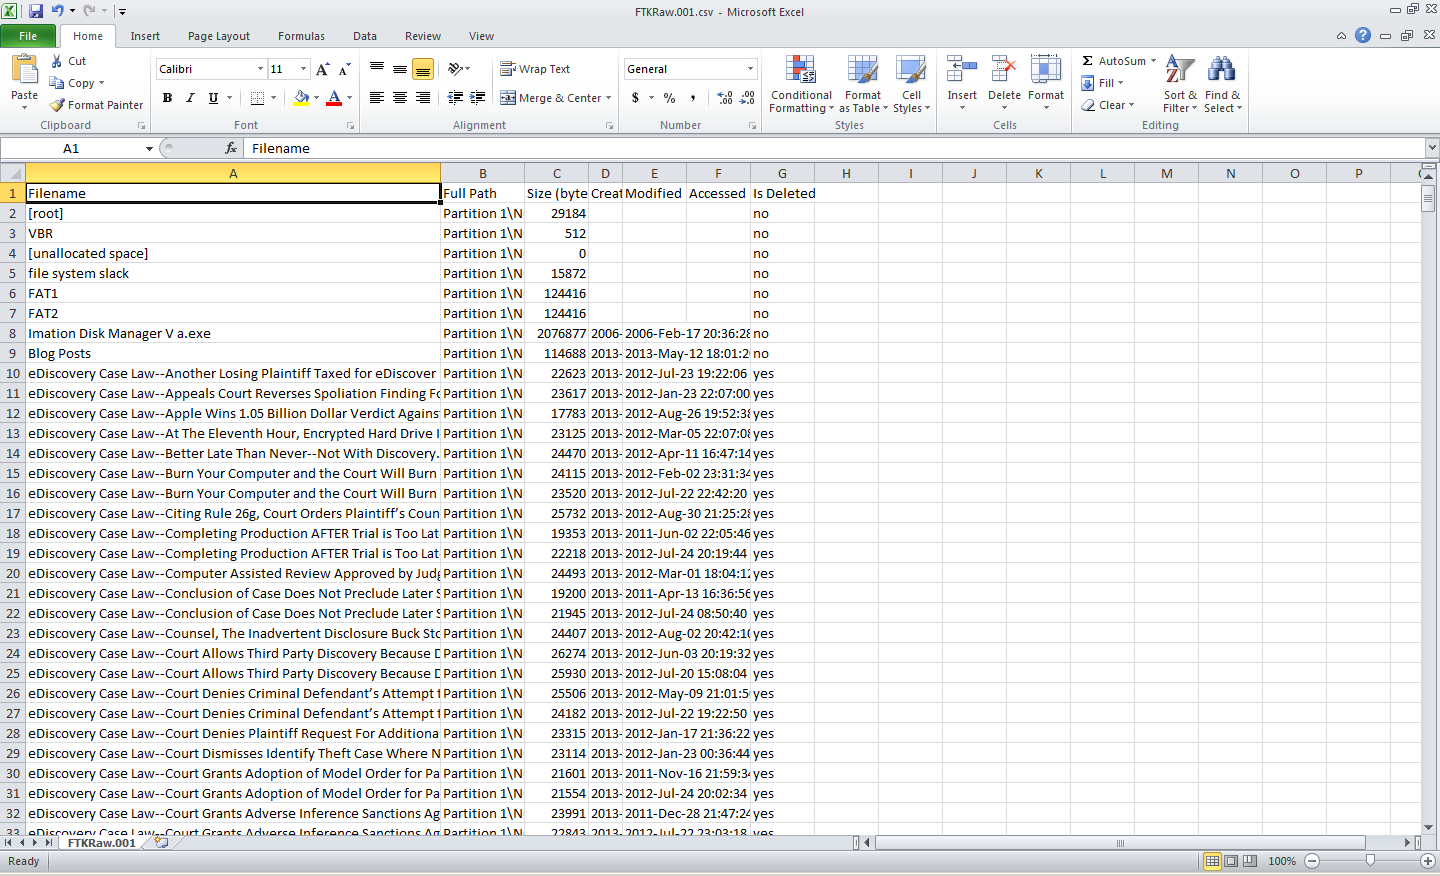
Directory Listing: If you selected Create directory listings of all files in the image, the results will be stored in a CSV file, which can be opened with Excel.
And, there you have it – a bit-by-bit image of the device! You’ve just captured everything on the device, including deleted files and slack space data. Next time, we’ll discuss Adding an Evidence Item to look at contents or drives or images (including the image we created here).
For more information, go to the Help menu to access the User Guide in PDF format.
So, what do you think? Have you used FTK Imager as a mechanism for eDiscovery collection? Please share any comments you might have or if you’d like to know more about a particular topic.
Disclaimer: The views represented herein are exclusively the views of the author, and do not necessarily represent the views held by CloudNine Discovery. eDiscoveryDaily is made available by CloudNine Discovery solely for educational purposes to provide general information about general eDiscovery principles and not to provide specific legal advice applicable to any particular circumstance. eDiscoveryDaily should not be used as a substitute for competent legal advice from a lawyer you have retained and who has agreed to represent you.